St. Valentine `s Day is coming soon,,,,,,,so I asked to the Team to create some special cards to celebrate this day,,,,and Mitra Lee was working with my "Be my Valentine CS" . She did these cute and so fascinating St Valentine`s Cards ......I really love every detail,,,,,,the gorgeus flower, the stunning ribbon ,,,and all over how colorful are they. Directly for her blog:
Lovey Dovely Cards with Nicecrane Image
I have gotten out all the Valentine's Paper I own and am making a futile attempt to make a dent in it. See Valentine's Day is one of my favorite holidays of all time and I hoard paper.I am in love with the Victorian images, hearts, roses and who doesn't like chocolate. ;-) .Plus, got married one really cold Valentine's Day almost 15 years ago.
I tend to get excited about making Valentine's Day cards and I like to send them too. It's kinda like my way of celebrating the holiday and our anniversary, sending out love in the mail!
Here is a photo of my pile of goodies right before I got started gluing down flowers and the images. I am not a huge card maker so I make them all the same.
Here is are the cards stand-alone.
I did have a fun simple little sketch to use from Get Creative that I rotated. I did add the banners, what a better way to use up thousands of little tiny cool smidges of paper!
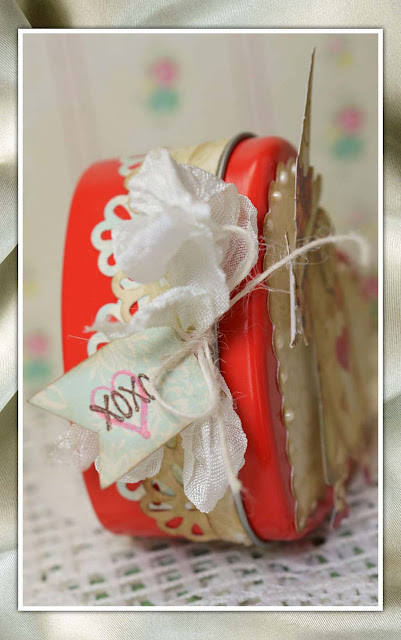
And, here is another shot of the cheese box I fancied up for my SIL.
Yes it is really a cheese box. I added shimmer modge podge and tissue paper with some black spritz and this is the end result. See, there it is all laid out ready to be made beautiful! ;-) Hope she likes it, I'm adding something yummy inside!
Happppppy Hump Day!
___________________________
You know I love Victorian Picts,,,, and all over Children, so I have designed a new Collage Sheet called "A Cozy Corner" including sweetie and amazing children pictures to use in any special ocassion.
Wenche Jensen from my DT was working with this New Sheet and take a look to her incredible Bag-Card, so unique, so vintage, so elegant..........Thanks a million Wenche.
A bag of cards from me again. Finished paper bag decorated with patterned cake napkin, flowers, pearls, a small bow and heart charm. The words are cut out from a klippeark from Paper Girls. This cutting sheet has really become a favorite with me. Designs from NiceCrane Designs A Cozy Corner Can also be seen scrapping.no.


Detailed View
And take a look to some picts on the collection:
A bag of cards from me again. Finished paper bag decorated with patterned cake napkin, flowers, pearls, a small bow and heart charm. The words are cut out from a klippeark from Paper Girls. This cutting sheet has really become a favorite with me. Designs from NiceCrane Designs A Cozy Corner Can also be seen scrapping.no.


Detailed View
And take a look to some picts on the collection:
__________________________
I must tell you Laura Bomber, show me this incredible creation working with my "Beautiful Ladies Backgrounds" by H. Fisher. so elegant card, so vintage, so unique gift,,,,,so directly from her blog:
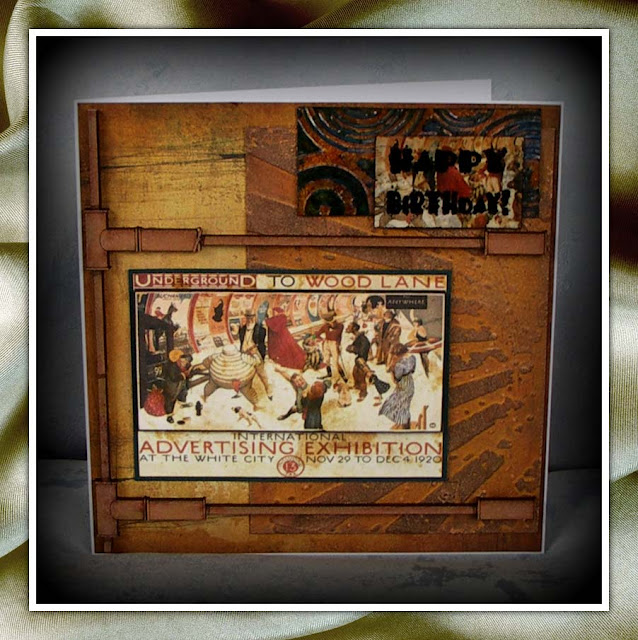
I wanted to make a vintage style card - You might have noticed a far more obvious vintage theme in my last few posts. Well, I am enjoying it so much I am not ready to stop yet - so the vintage inks came out again!

As you all know, from my last post, the printer waved the white flag and has decided to start printing again....One of the first things I printed up were these gorgeous images I got from Nicecrane designs. The one I used on this card was from the 'Beautiful ladies' set. If you have never been to the Nicecrane website or blog - you should really take a look. There are so many amazing images there- You will be spoilt for choice. Whatever your style of arts and crafts you will find the perfect images for you.....
Here is the picture I used on the card. It was stuck onto a piece of white card. Then I inked some white card with Antique Linen and applied the image on top of this. The layered effect was continued with some more white card on which had Bundled Sage blended over it. Once cut to size I blended some Walnut Stain DI around the edge.
To construct the card I repeated the technique I used on the Vintage Fashiontag. This is where I stamped images over the card and masked them and covered the area with a script stamp. I again used the black archival 'semi dry' pad so it wasn't a very dark print. I was also using the ink pad less carefully than usual so there wasn't a complete coverage of ink on the stamp - this gives a muted faded image, sometimes a partial image. I think this gives a lovely vintage feel to the piece. I went over the entire piece with Antique Linen and Pumice Stone DI's using the blending tool. Then I smudged some Walnut Stain DI around the edges........


Down the centre of the card I wanted a strip of pale green. So using the Tim Holtz wrinkle free distress I used some Bundled Sage and Antique Linen DI's. I kept dabbing the piece of card in the ink until I had the effect i wanted. I then cut the strip of card to size and inked the edges with more of the same inks.
To do the birthday wishes banner I cut a strip of card, inked with Antique Linen and edged in Walnut Stain. I stamped the words with black archival ink. I was going to just place the words on the card but as I did this I decided I wanted it raised off the card rather than placed flat. I began to roll the edges - which looked nice but I felt something was missing. Hunting through the ribbon drawer I got some sage ribbon and glued it to the back of the banner. Then I rolled up the edges into a scroll effect and glued them.
......I liked the card as it was and while I didn't want to detract from the image, I wanted some more detail. I stained two roses with Antique Linen and two with Victorian Velvet. I had some paper covered wire so used the twirls of wire that I love so much to decorate the bouquet and hold it together as well. I tried to tie up the bouquet with the wire but it looked messy. So I dyed some very narrow ribbon with some Bundled Sage DI and to add to the vintage look I attached an antique style pendant into which I had put an image of roses.
I had a 6 x 6 white card blank so I inked the entire front of the card with Antique Linen DI and then attached the inked and stamped card creation to it.

Thanks a million to all DT members and Laura Bopmber for these creations....
Enjoy my latest releases and be different.
Enjoy my latest releases and be different.


